Solvent welding in a cold environment presents challenges that have to be counterbalanced. Why? Pipe and fittings take longer to soften in colder weather. The pipe is also more resistant to solvent attack, so softening it with an aggressive primer is important during cold weather. By following certain cold-weather solvent welding instructions, and demonstrating patience Read more
PVC
Solvent welding in a cold environment presents challenges that have to be counterbalanced. Why? Pipe and fittings take longer to soften in colder weather. The pipe is also more resistant to solvent attack, so softening it with an aggressive primer is important during cold weather.
By following certain cold-weather solvent welding instructions, and demonstrating patience, you can successfully solvent weld pipe joints in sub-zero temperatures (as low as -15°F).
We’re sharing seven tips to ensure successful solvent cemented pipe joints during the cold winter months.
-
Prefabricate as much of the piping system as possible in a warm environment.
We recommend assembling as much of the piping system as possible in a heated work environment. If you can control the temperature, it’ll make for better joints.
Any joints that must be made at the assembly work-site should be protected by some sort of temporary or portable shelter.
-
Store cement and primers in a warmer area.
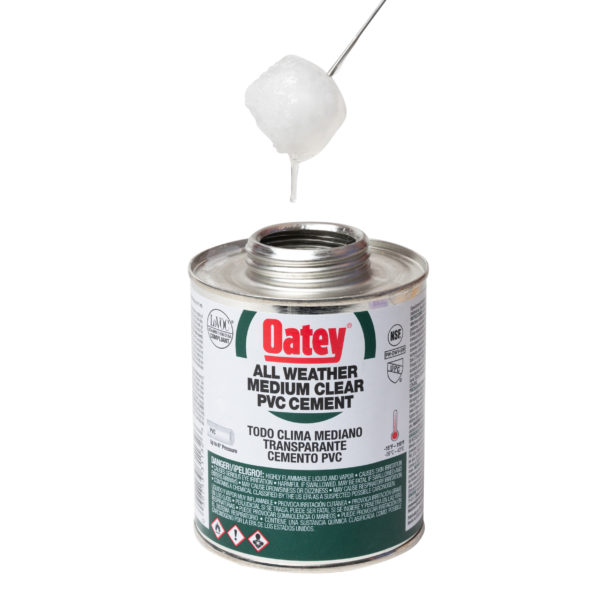
Colder applications will require storing your pipe cement in a warmer environment (above 40°F). It’s important not to leave solvent cement outside in the cold for an extended period because it will take on a gel-like consistency. If the cement has gelled, we do not recommend using it. Solvent cement should remain fluid.
If you have bulk items on the jobsite, be sure to store them in a temperature-controlled area so it doesn’t come in contact with the cold.
Maybe you keep your cement and primers on your truck dashboard while you’re traveling between jobsites. In that case, if you’ve been out for a couple of hours, we recommend bringing them inside after your last service call. That way, the product can get acclimated to the warmer temperature and reach the right consistency for your next project.
-
Remove moisture from the ends of pipe and surfaces.
Before starting the solvent welding process, take time to clean off pipe ends and fittings to remove any dampness, residual water or ice. If moisture penetrates the cement, it will cause it to gel.
Of course, wet or damp conditions are sometimes unavoidable. In that case, we recommend using a solvent cement formulated to cure in damp conditions, like Oatey Rain-R-Shine, a fast-set cement designed for wet conditions.
-
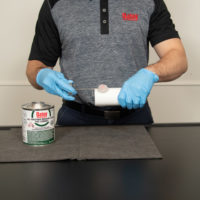
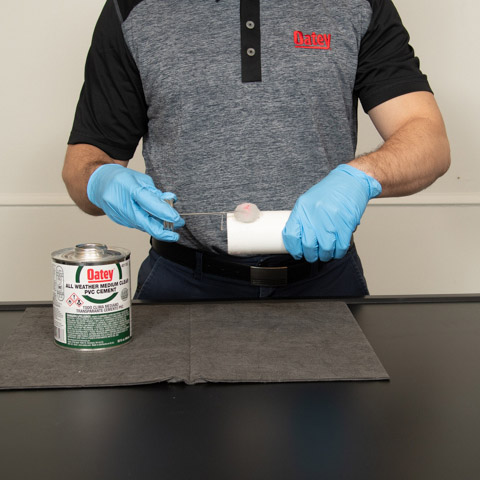
Aggressively apply primer to fittings and pipe.
Particularly in colder applications, be sure to apply and aggressively work in primer. Primer must be used to create a solvent weld on PVC and CPVC pipes. Oatey Purple Primer is an NSF-listed primer for use on all schedules and classes of PVC and CPVC pipe and fittings.
To understand the importance of applying primer, it may be helpful to think of the fitting and the pipe as your skin. Your pores are coated and closed tightly; working the primer more aggressively onto the fitting and the pipe will ensure that you open up the pores. That way, you are preparing the pipe to accept the cement.
While applying primer to fittings and pipes, be sure to re-dip between each application. Once you have primed the pipe and the fitting, you have five minutes to apply cement and finish the connection. Waiting too long will negatively affect the creation of a good solvent weld.
-
Vigorously shake or stir cement before usage.
Before every use, we recommend shaking the can or stirring its contents before application. That’ll help blend in the components of the cement, making sure you get an even consistency throughout.
-
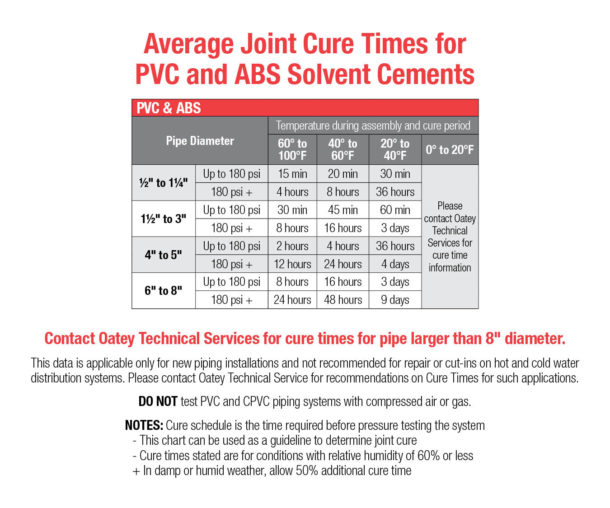
Allow a longer cure time before testing or using the system.
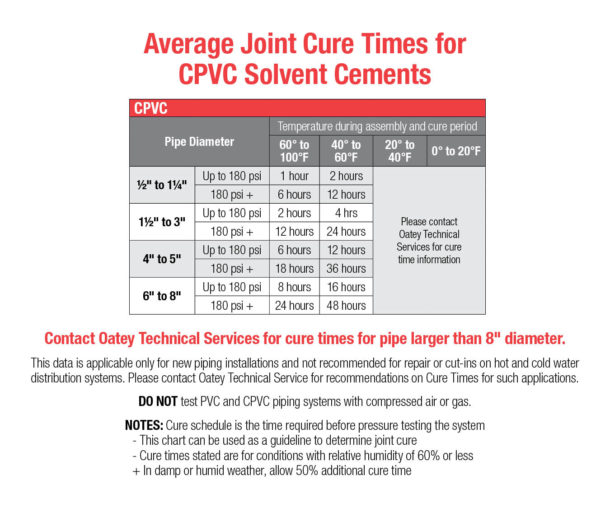
Cure time depends on several factors: pipe material, pipe size, ambient temperature and humidity. However, solvent cement will take longer to cure in colder temperatures. Allow enough time for the solvents to evaporate before testing the system or putting it in service.
In temperatures between 20°F to 40°F, the joint may take up to three days to fully cure for higher pressure applications. However, be sure to refer to the average joint cure times provided by the manufacturer for PVC, ABS and CPVC solvent cement. For temperatures below 20°F, we recommend contacting Oatey Technical Services for exact cure time information.
Do not attempt to speed up the cure time by applying direct heat to the joint because that could deteriorate joint strength or affect the integrity of the pipe.
However, you can create a temperature-controlled environment to accelerate the process. If you have a temporarily heated area, you may close off the openings of the dwelling to help speed the process while leaving your pipe ends open so that airflow can enter the system and help the solvents evaporate.
View our overview document for more information on all our cement offerings and their cure/set times.
-
Follow all ASTM standards and steps.
It’s important to follow all ASTM standards and steps in the solvent welding process. Be sure not to skip any when preparing the pipe — for example, choosing not to chamfer the pipe.
If you don’t chamfer the pipe or bevel the outside edge, the sharp edges can scrape the cement off the walls of the fitting, as the pipe is being inserted. This could potentially cause blockage or leak paths.
In colder temperatures, it is especially important not to skip these steps because the cold makes creating a solvent welded joint more challenging. To ensure you follow all ASTM standards and create a perfect solvent weld, avoid these five common solvent welding mistakes.
With our application tips for cold-weather solvent welding, you’re well on your way to creating long-lasting, leak-free connections this winter.
Author’s biography: Sean Comerford is a Technical Customer Service Specialist at Oatey Co. He is a third-generation tradesman with nearly 20 years of plumbing experience, including serving as the lead plumber for commercial/residential new construction, service and fire protection jobs. He holds a State of Ohio Fire Protection License for Sprinkler and Standpipe.
As the deep winter freeze arrives, frozen or burst pipes can become prevalent. Dealing with an unexpected leak is the last thing anyone wants to tackle in the middle of a busy season; but if it happens, there’s a quick solution to restoring ruptured pipes with no specialty tools, soldering, crimping or glue required: SharkBite push-to-connect Read more
![]() As the deep winter freeze arrives, frozen or burst pipes can become prevalent. Dealing with an unexpected leak is the last thing anyone wants to tackle in the middle of a busy season; but if it happens, there’s a quick solution to restoring ruptured pipes with no specialty tools, soldering, crimping or glue required: SharkBite push-to-connect slip and transition fittings.
As the deep winter freeze arrives, frozen or burst pipes can become prevalent. Dealing with an unexpected leak is the last thing anyone wants to tackle in the middle of a busy season; but if it happens, there’s a quick solution to restoring ruptured pipes with no specialty tools, soldering, crimping or glue required: SharkBite push-to-connect slip and transition fittings.
“SharkBite gives you a wide range of slip fittings and valves to repair burst copper or CPVC pipes quickly,” said Michael Kornegay, SharkBite Product Manager. “Up to two inches of damaged pipe can be removed using a single fitting, even in wet lines, and a drain valve can be easily added to prevent future freezing.”
Ideal for working with multiple pipe types and in tight spaces, SharkBite’s Brass Push transition fittings can be installed in wet lines and can transition between pipe types, including PEX, copper, CPVC, PVC, polybutylene, HDPE and PE-RT pipes, making them one of the most versatile solutions.
“SharkBite’s push-to-connect transition fittings come with color-coordinated collars for each specific pipe material,” Kornegay continued. “The tool-free transition fittings allow for quick and easy repair of copper pinhole leaks and replacement of brittle polybutylene pipe or broken CPVC.”
Since pipes are at a higher risk of freezing and bursting in the winter, it pays to have a solution like SharkBite’s push-to-connect slip and transition fittings handy for a quick fix. Follow these steps to get the job done fast:
- Cut the pipe cleanly – Be sure the pipe is clean of scratches or debris. If working with copper pipe, use a deburr tool or sandpaper to remove any sharp edges or burrs.
- Measure and mark the insertion depth – Use SharkBite’s Deburr & Gauge Tool to mark the insertion depth on the damaged pipe.
- Make the connection – Push the fitting to the insertion marks. Then, turn on the water and check the connection.
When it comes to repairing a burst, frozen pipe, SharkBite push-to-connect slip and transition fittings save time. Pipe transitions make working with PEX, copper, CPVC, PVC, polybutylene, HDPE and PE-RT pipes hassle free, and SharkBite offers the flexibility of repairing the damaged pipe in wet lines under full flow.
“Just cut, push and done,” Kornegay said. “These SharkBite products allow you to quickly repair those frozen, burst pipes in a short amount of time, so you can finish a job with ease and move on to the next.”
Learn more about SharkBite’s repair options at SharkBite.com.
The LevelBest offering from Jones Stephens is a complete drainage and cleanout system. LevelBest drains allow for adjustment to floor level after the concrete is poured. The adjustment of the spud eliminates the need to break and repair the floor when the concrete is poured too high. The drainage system is compatible with PVC, ABS Read more
 The LevelBest offering from Jones Stephens is a complete drainage and cleanout system. LevelBest drains allow for adjustment to floor level after the concrete is poured. The adjustment of the spud eliminates the need to break and repair the floor when the concrete is poured too high. The drainage system is compatible with PVC, ABS or Cast Iron drains and cleanouts and feature industry standard IPS threads that are compatible with most adapters and drain bodies. Jones Stephens. For more info on LevelBest Drains and other plumbing products, visit www.jonesstephens.com.

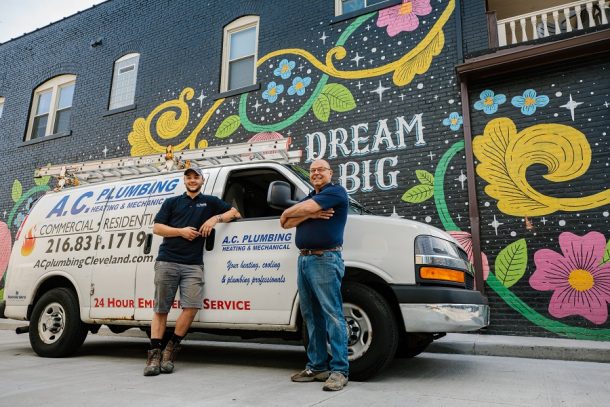
Family businesses work when everyone is invested in a common goal. Half-hearted efforts and attitudes, jealousy or near-sightedness are the kiss of death when parents, siblings and in-laws are involved. But when all are engaged and aligned fruitfully, the result can be an uncommonly strong enterprise with long-term potential. AC Plumbing, Heating & Mechanical in Read more
Family businesses work when everyone is invested in a common goal. Half-hearted efforts and attitudes, jealousy or near-sightedness are the kiss of death when parents, siblings and in-laws are involved.
But when all are engaged and aligned fruitfully, the result can be an uncommonly strong enterprise with long-term potential.
AC Plumbing, Heating & Mechanical in Cleveland, OH, seems to have written the handbook for success in family business, though that wasn’t initially the plan. Tony Caruso started the firm with his wife LuAnn, in 1980, while also serving as a professional fireman.
Today, their children operate the 14-person company in Bedford Heights, OH.
Daughter Monica runs the office and her husband, Kelly Miller, is head of the HVAC shop. Anthony, like his father, is a professional fireman and paramedic, working 24 hours on, 48 off. When he’s not on duty at the firehouse, he’s the lead hydronic technician. Michael, who has a construction management degree, is the company’s lead plumber.
 Under their direction and Tony’s mentorship and guidance, the business has flourished.
“I never envisioned all of this with my children,” said Tony Caruso. “I didn’t plan for them to join the company, let alone see the potential for them to propel us forward. But I’ve always believed this profession was something special. Having them join me has been a tremendous source of pride.”
Today, the company’s reputation for outstanding craftsmanship is validated by long-standing customer relationships, both commercial and residential. Some of those clients haven’t changed since the early years, when LuAnn was still writing invoices from notes that Tony scratched in the firehouse breakroom.
As Tony takes a back seat to day-to-day operations, it has given him time for volunteer work, and to tackle personal projects.
Restoring antiquity
“I’m drawn to old things, especially mechanical in nature,” said Tony. “Volunteering at a historic railway has been rewarding, especially when I can involve my grandchildren. I love to bring things back to their proper vintage and grace; cabooses, automobiles, buildings, etc.”
In part to scratch an itch and partly as a long-term investment, Tony and LuAnn purchased a 100-year-old building near downtown Cleveland in 2017. The Detroit Avenue area is slowly experiencing a renaissance of sorts. Young people are moving back in, small businesses are cropping up, and property values are plodding patiently upward.
Caruso bought the old building as a rundown residence. Police were frequently called to the address for one sort of disturbance or another. But with plenty of vision and know how – not to mention the involvement of a team of mechanical technicians – Tony and LuAnn had other plans.
They’re just now finishing the details on the 5,000 square-foot building. An upscale salon and spa occupies the ground level, with floor-to-ceiling windows along the sidewalk. The upstairs is divided into two apartments, with a third being added behind the salon.
Half of the basement slab received a pebble finish called Natural Stone. No sooner had the top coat cured before water backed up into the basement.
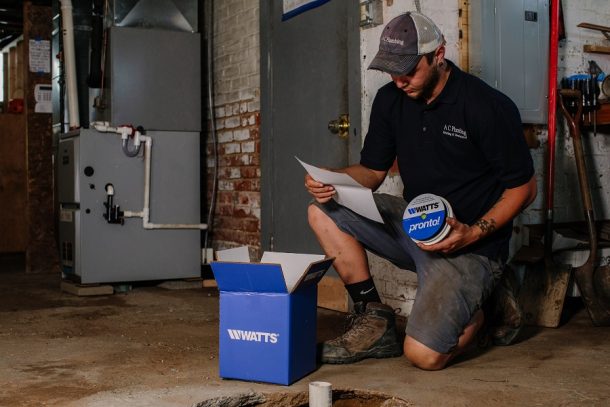 “We thought we’d need to hammer out a part of the new floor to access a clog in the old porcelain plumbing, and install a drain at that spot,” said Caruso. “So we purchased a Watts Pronto!™ floor drain because of the ability to do post-pour adjustment between the concrete and finished floor.”
Then Michael and Zac Wood, one of the company’s plumbers, scoped the pipe. It became apparent that the clog could be remedied without digging up the floor. Jagged edges on the old cast iron pipe within a fitting were catching sewer debris. By snaking the pipe with a heavy cutter tip, the issue was remedied.
In an adjacent basement room without finished flooring, the building had a plumbing stack coming down from the first floor. It was no longer in use, and just in the way.
“We wanted to remove the stack for more storage space,” said Michael. “But in a building like this, where the use of occupied space can easily change in the future, we try not to eliminate sewer connections. We already had the Pronto! drain in the van. It’s a little overkill for an unfinished slab, but it definitely served the purpose.”
 Zac hammered-out the floor, installed a new trap, then poured new concrete and installed the drain.
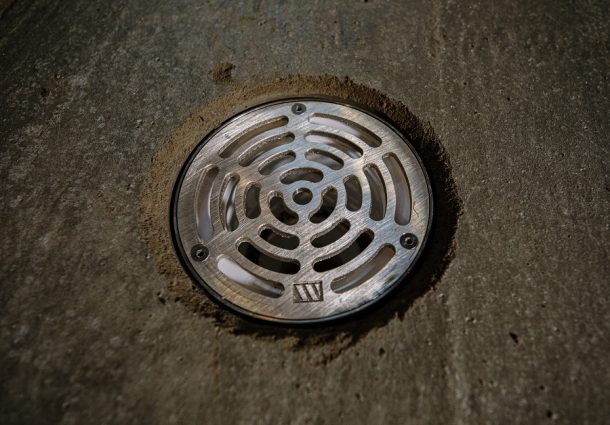
“The real benefit of the Pronto! floor drain is that the drain can be adjusted twice,” said Zac. “The basin can be raised or lowered to match the initial concrete pour, and then the strainer can be adjusted to match the finished floor grade. It comes with a set of shims to get a perfect level. On this installation, though, we only needed to make one adjustment. Using the drain’s integral bubble level, I was able to plumb-in the drain perfectly just by adjusting it after making my PVC connection.”
The Watts Pronto! floor drain is available in either cast iron or PVC, and comes in grate sizes of 5”, 6” or 8”.
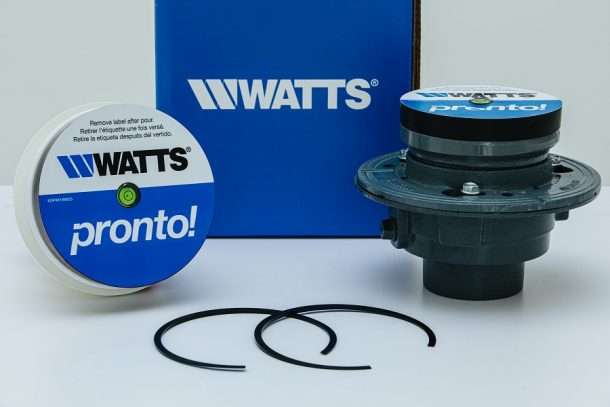 “We’ve used a variety of Watts products since I started the company,” said Tony. “Our hydronic installations are covered in Watts valves, and we often use tekmar controls. We also like their backflow assemblies. We picked the Pronto! drain, despite it being a completely new product, based on the quality of products we’ve come to expect from the brand.”
With the plumbing issues resolved at the investment property, the Carusos can focus on finishing the final rental unit. The building is now an integral part of the Detroit Avenue urban revitalization effort, inside and out. Two walls on the building feature giant murals, a theme throughout the area. It’s another source of pride.
Doing right
“Not everyone at AC Plumbing is family, but they may as well be,” said Tony. “Every member of our team is vital. We hire people that want to provide service. That is, in my judgement, the finest pursuit. The responsibility to our team is never to do less than the right thing. That may include engineering the correct system, performing the proper replacement or repair, or taking responsibility for mistakes. Good business ethics.”
Tony’s quick to note that the industry and market is changing rapidly, and is thankful that his children are proactively keeping pace with it. Clients have become much more astute in regard to what they want in their homes. Systems are now “on demand,” “green” or otherwise designed primarily for comfort.
“The daily challenge we now face is installing a system that never compromises safety, comfort or efficiency,” Tony continued. “In years’ past, things were simpler, and efficiency wasn’t as critical. These factors have truly raised the bar on what it means to be a plumbing or HVAC professional. Fortunately, manufacturers and reps are providing more support than ever before.”
“I feel that being trusted in a customer’s home is the greatest responsibility,” Tony said. “As my career winds down, I feel that my family has that same passion. At the end of the day we can all rest knowing we’ve done what is dutifully right.”