The other day I performed a Google search for ‘How to detect an air leak’. Not surprisingly it came up with millions of results, over 18 million in fact. Whether solving the problem in a commercial establishment or a domestic home environment, the majority of search results pointed to one solution. Namely, soapy water! Before Read more
Industry Blogs

The other day I performed a Google search for ‘How to detect an air leak’. Not surprisingly it came up with millions of results, over 18 million in fact.
Whether solving the problem in a commercial establishment or a domestic home environment, the majority of search results pointed to one solution. Namely, soapy water!
Before we all ridicule the idea as belonging to a bygone era, take a vehicle with a slow puncture to a tyre fitting depot and the chances are they remove the wheel and spin it in water to determine the leak. It’s a simple time proven method for determining leaks from pressurized systems.
 But of course, not all equipment can be placed in soapy water. What if a system is known to be losing pressure and yet the lines carrying the compressed air from the source are located 10 metres above the ground, and dismantling the system is out of the question? Thankfully there is a fast and effective solution to hand.
Each time air or indeed any gas, leaks from a pressured system there is an associated sound. If the leak is significant, it can be audible to the human ear and therefore easily identified and rectified accordingly. However, most leaks in high pressure systems are extremely small and are out of the range of a human ear.
Think about a pressured air system on a large factory delivering compressed air from a bank of compressors to various stages of production throughout the manufacturing process. The chances are there are hundreds if not thousands of connections in the form of joints, reducers, valves, elbows, condensers etc. Each of these has the potential to leak small amounts of air, reducing the pressure of the system.
One leak might make very little difference but multiply this by the number of potential leaking joints and efficiency can be significantly compromised. The compressor will seek to compensate for any pressure loss by simply working harder. However, as any engineer will know, compressors can be expensive to operate in terms of energy and therefore will certainly increase an operators energy consumption.
With electricity costs being so much higher in Europe due to geopolitical factors in recent years, most companies are seeking to reduce the amount of energy used. Having a compressor work overtime to compensate for leaking joints is certainly not something senior management would smile about!
These scenarios are certainly not uncommon, in fact one European compressor manufacturer has stated that in some industrial settings, up to 80% of air generated is lot in leaks. So clearly identifying these small leaks can make a real difference to a company’s energy bills.
Although the sound produced by a small leak is inaudible to the human ear a high performance acoustic imaging camera such as the FLIR Teledyne Si2 – LD will have absolutely no problem identifying the source. Launched earlier this year the camera is capable of detecting leaks of 0.05 litres per minute at a distance of 10 metres, meaning those elevated air lines pose no problem for this latest instrument in the FLIR acoustic imaging camera line up.
For closer work the camera is even more sensitive and can detects minute leaks of 0.0032 litres per minute at a distance of 2.5 metres. Coupled with this improvement, the third-generation camera has improved microphones now capable of detecting sounds over an extremely wide frequency range, namely 2 – 130 kHz.
Areas of plant are often dark or dimly lit. for this reason FLIR have fitted the FLIR Si2-series of cameras with two powerful LED lights to make component identification easy even in poorly lit conditions.
Of course, it’s not just compressed air that the camera is capable of detecting; noise emitted by any escaping gas is identified by the powerful microphones. However that’s only part of the story.
The FLIR Si2-LD has built in software termed Industrial Gas Quantification. If the leaking gas is ammonia, hydrogen, helium, or carbon dioxide, very commonly used gases in a number of industries, the software is capable of quantifying the financial loss caused by the leak. By simply entering factors such as the cost per litre, the software identifies the amount each leak is causing over a given period of time. Such data is invaluable to financial analysts and senior management within an organisation.
It goes without saying that the financial considerations are only one aspect of leaking gas. The gases mentioned above all carry significant health hazards and can present a variety of dangers to personnel if allowed to leak for any period of time. Ammonia and carbon dioxide can cause serious breathing problems and asphyxiation even in smaller concentrations, whereas hydrogen can explode in the presence of oxygen. Clearly the cost of such problems goes way beyond any financial considerations.
We’ve come a long way since the ‘soap and water’ approach. See how the latest technology from FLIR Teledyne can help in reducing downtime, lower energy bills and improve safety in your organisation.
Visit www.flir.com or contact you local FLIR Teledyne agent or distributor.
 Author: Darrell Taylor
Email: Darrell.Taylor@teledyne.com

By Heather Ripley It’s every business owner’s nightmare: You wake up to news that an employee has gone on a crime spree in the branded company van, he’s arrested, and your logo is seen in the background all over social media. Or your staff accountant gave out his username and password to a phishing email Read more
By Heather Ripley
It’s every business owner’s nightmare: You wake up to news that an employee has gone on a crime spree in the branded company van, he’s arrested, and your logo is seen in the background all over social media.
Or your staff accountant gave out his username and password to a phishing email. As a result, the online accounting platform your company uses was hacked, and all your customers’ financial data has been accessed.
It doesn’t matter that neither of these incidents are your fault, your company might still be seen in a bad light.
But if you have a public relations crisis management plan already in place, you know what your next steps are to mitigate the damage a bad event can have on your company’s reputation.
If you don’t have a plan, here are five steps you should take immediately so that you aren’t caught flat-footed when a crisis happens.
1. Don’t assume the crisis will organically go away
There was a time when news didn’t spread as quickly as it does now. Back then, you might have been able to sit tight for a week or two and wait until people grew tired of talking about the bad news. That’s not a luxury in this day and age.
You need to take immediate action and get in front of the crisis. Whether you need to issue an apology or get your side of the issue out, you need to act as soon as possible.
2. Don’t downplay the severity of the situation
Even if no one was physically hurt in the scenarios listed above, that doesn’t mean that individuals weren’t affected. People may have lost a precious family keepsake due to your employee’s actions, or your customers may have had to spend all day changing their banking and credit card information to protect their finances.
Even if you aren’t at fault, you should show empathy for what has happened to them. You need to be authentic in your concern and act quickly to remediate damages.
3. Do communicate immediately with stakeholders
Make sure you hold a company-wide meeting to explain the crisis to your employees, critical managers and any partners you may have. Let them know that you will assemble a team to respond to the accusations and ask them to direct questions to the individual you’ve selected to be the spokesperson.
Your employees should not feel like they have to defend your company or their jobs.
4. Do get with your PR team to ready a statement
It’s never a good idea to hide from the problem. Once you have found out more about the crisis, you should get with your PR team and attorney to pen a statement. This doesn’t have to be shared unless the media reaches out for comment, but it should be vetted and ready to share at a moment’s notice.
You should also have social media statements ready, as well. Social media is used by thousands of people as a news aggregator, so being prepared to put your statement out on your company’s Facebook, Instagram or LinkedIn channels is a necessity.
Your statement should let the public and your customers know you have fired the offending employee, for example. Or let them know what steps your financial institution or accounting software company is taking to remediate damages.
Apologize for their troubles and inconvenience, and state what you are doing to fix the problem.
5. Do be sincere with your apology
While it might be tempting to start pointing fingers and burying your apology in a flurry of other online responses or press interviews, don’t do this.
Sure, you can’t help what your employee does on his own time, but it doesn’t do you or the people who have been affected by these actions any good to muddy the waters by discussing issues that aren’t related to the crisis at hand.
According to a recent Price Waterhouse Cooper survey, 69% of business leaders have experienced a corporate crisis. It’s not a matter of if a crisis will happen, it’s more a matter of when.
Ideally, this is why you should already have a crisis communications plan ready to go. A complete plan will help you take control, protect your assets and put you on the path toward regaining customer trust.
A true PR partner will anticipate your needs and have a crisis management plan already in place. This plan generally includes a list of personnel on the crisis management team, the name of the person who will serve as your company’s spokesperson, and the protocols for issuing press releases and social media posts, should they become necessary.
Your PR team will also provide you with ways to determine if your mitigating efforts are having a positive effect and can make adjustments for you if they aren’t working as well as they should.
While you can’t control the world around you, you can certainly control how you respond to it. Putting together a crisis communication plan may seem like a lot of work, but it’s an essential part of doing business.
A crisis may not spell the end of your business, but it can damage your bottom line, harm your employees and affect your future if you don’t take it seriously.
 Heather Ripley is founder and CEO of Ripley PR, an elite, global public relations agency specializing in the franchising, skilled trades and B2B tech industries. Ripley PR has been listed by Entrepreneur Magazine as a Top Franchise PR Agency for six consecutive years and was recently named as one of Newsweek’s America’s Best Public Relations Agencies for 2024. Heather Ripley was recently named as a 2024 PRNews Top Women honoree in the business entrepreneur category. She is also the author of “NEXT LEVEL NOW: PR Secrets to Drive Explosive Growth for your Home Service Business,” which is now available on all audiobook platforms. For additional information, visit www.ripleypr.com.
By Sean Comerford Silicone sealant is an essential tool for plumbers and contractors alike. Known for its flexibility, durability, and water resistance, it proves invaluable across a broad spectrum of plumbing applications, effectively sealing everything from air to water. This article delves into advanced techniques and best practices for using silicone sealant and offers unconventional Read more
By Sean Comerford
Silicone sealant is an essential tool for plumbers and contractors alike. Known for its flexibility, durability, and water resistance, it proves invaluable across a broad spectrum of plumbing applications, effectively sealing everything from air to water. This article delves into advanced techniques and best practices for using silicone sealant and offers unconventional uses for plumbing situations.
Advanced Techniques for Using Silicone Sealant
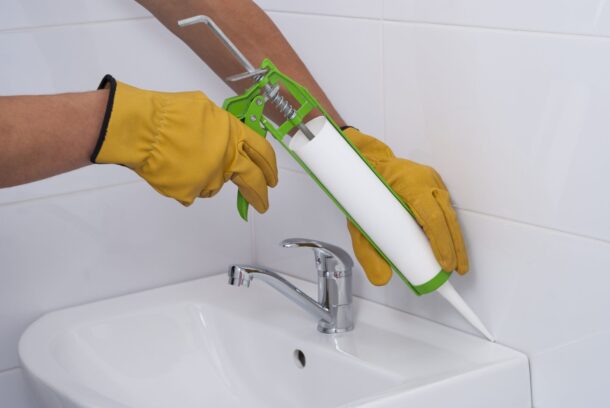
Proper Application Methods: The effectiveness of silicone sealant largely depends on how well it is applied. Ensure the application area is clean, dry, and debris-free. Use a caulking gun to apply a continuous bead of sealant, maintaining steady pressure to avoid air bubbles. Smooth the bead with a caulking tool or your finger dipped in soapy water to achieve a clean finish.
Accurate Sealing in Difficult Areas: Sealing tight or awkward spaces can be tricky. Utilize specialized tools like angled nozzles and flexible extension tubes to reach narrow gaps and corners. When dealing with vertical surfaces, apply the sealant from the bottom up to prevent sagging.
Enhanced Bonding to Various Materials: Silicone sealant is highly effective in bonding various materials, including glass, metal, and plastic. For optimal adhesion, choose a sealant compatible with the specific materials you are working with. Apply a primer if recommended by the manufacturer to enhance bonding strength, especially on non-porous surfaces.
Leveraging Tools for Maximum Performance: Leverage tools such as caulking guns with adjustable pressure settings, smoothing spatulas, and silicone finishing kits to refine your application. These tools improve the quality of your work and increase efficiency, allowing for faster completion times.

Best Practices for Silicone Sealant Application
Surface Preparation: Proper surface preparation is crucial for a successful seal. Clean the area thoroughly with a degreaser or alcohol-based cleaner to remove any oils or residues. Use a wire brush or sandpaper to roughen smooth surfaces, ensuring better grip for the sealant.
Choosing the Right Type of Silicone Sealant: Different plumbing tasks require different types of silicone sealant. For example, opt for high-temperature silicone for areas exposed to heat, while mildew-resistant sealant is ideal for bathroom and kitchen applications. Read product labels carefully to select the appropriate sealant for your specific needs.
Handling and Curing Considerations: Proper handling and curing are vital for the longevity of the seal. Store sealant tubes in a cool, dry place and ensure they are within their expiration date. After application, allow sufficient curing time as specified by the manufacturer, typically 24 to 48 hours. Avoid exposing the sealant to water or extreme temperatures during this period.
Maintenance and Longevity Strategies: To extend the life of your silicone seals, conduct regular inspections and touch-ups as needed. Remove and reapply sealant if you notice any signs of degradation, such as cracking or peeling. Use UV-resistant silicone for outdoor applications to prevent damage from sun exposure.

Unique or Less-Known Applications of Silicone Sealant in Plumbing
Downspouts: Silicone sealant can effectively seal seams and joints on downspouts in residential and commercial buildings. It can be especially beneficial in regions with heavy rainfall or snowfall, where water can easily penetrate cracks and weaken the downspout’s structure. It can also help reinforce the connections between different sections of the downspout, ensuring a secure fit that can withstand harsh weather conditions.
Hose Bib: When installing or repairing a hose bib, consider using silicone sealant around the base where it meets the wall to reinforce the bond. This watertight seal can prevent leaks and potential water damage while ensuring a secure connection capable of withstanding external stressors. Silicone’s elasticity allows it to expand and contract without losing its seal, making it perfect for outdoor applications.
Sewage Ejectors or Sump Pumps: When dealing with sewage ejectors or sump pumps where pipes protrude through a basement wall or foundation, consider applying a silicone sealant to create a watertight seal and prevent any potential leaks or seepage. This serves to protect the surrounding area from water damage and corrosion while also ensuring the efficient operation of the pump.
Roof Penetrations: Silicone sealant can serve as a viable temporary solution for addressing roof penetrations when immediate repair of the roof flashing is not feasible. By applying silicone sealant around the area of the roof penetration, a temporary barrier is created to prevent water leaks and potential damage until a permanent fix can be implemented by a professional roofer. This quick and easily accessible option can provide temporary relief and protection until the repair can be completed.
Silicone sealant is an indispensable product in the plumbing industry, offering versatility and reliability for many applications. Its superior water resistance, flexibility, and ease of use make it a preferred choice among plumbing professionals. By following these techniques and best practices and exploring unique applications, plumbers and contractors can maximize silicone sealant’s benefits.
 Sean Comerford is a Technical Applications Manager at Oatey Co. He is a third-generation tradesman with nearly 20 years of plumbing experience, including serving as the lead plumber for commercial/residential new-construction, service and fire protection jobs. He holds a State of Ohio Fire Protection License for Sprinkler and Standpipe.

When you step into an older or historic home, it’s like walking into a piece of history. Each home has its own story, and with that story comes a unique and often-varied set of plumbing issues. Successfully navigating these challenges requires a deep understanding of the problems as well as the techniques needed to address Read more
When you step into an older or historic home, it’s like walking into a piece of history. Each home has its own story, and with that story comes a unique and often-varied set of plumbing issues. Successfully navigating these challenges requires a deep understanding of the problems as well as the techniques needed to address them effectively.
Outdated materials
Many older homes were built with plumbing materials that are no longer in use today. Common materials include galvanized steel pipes, cast iron and even lead. These materials can pose significant health risks and are prone to corrosion and deterioration over time. For example, galvanized steel pipes are known to rust and corrode, leading to reduced water pressure and leaks. Cast iron — while durable — can crack or become brittle. Lead pipes pose a severe health risk due to lead contamination.
Hidden repairs
Older homes often have layers of renovations and repairs made over the years. These hidden repairs can include patchwork fixes, makeshift solutions and outdated techniques that may not meet current standards. Tradesmen may find it difficult to identify and address these hidden repairs, especially when they are concealed behind walls, under floors or within ceilings. This can complicate the diagnosis of plumbing issues and require more invasive methods to uncover the root problems.
Potential code violations
Plumbing codes have evolved significantly over the decades. What was acceptable in the past may now be considered a violation of today’s building codes. This can include pipe sizes, venting requirements and materials used. When working on older homes, it’s essential to verify all plumbing work complies with current codes and regulations. This not only guarantees the safety and efficiency of the plumbing system but also helps to avoid legal and insurance issues.
Best Practices for Navigating Challenges in Older Home Plumbing
Conduct thorough inspections
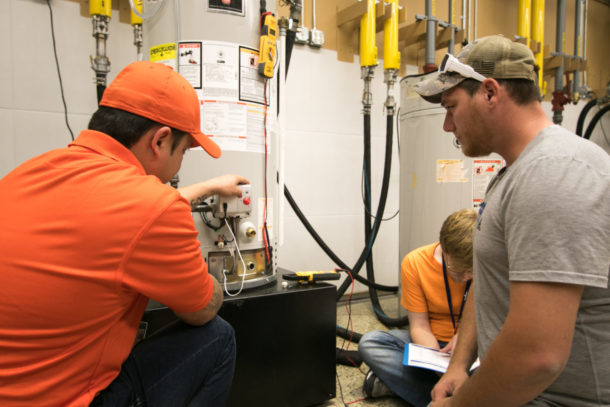
Before beginning any repair or renovation project, conduct a comprehensive inspection of the entire plumbing system. This should include checking for signs of corrosion, leaks, water damage and outdated materials. Use advanced tools such as video inspection cameras to assess the condition of pipes and identify hidden issues that may not be visible through a standard visual inspection.
Prioritize safety and compliance
Safety should always be the top priority. Replace any lead or galvanized steel pipes with modern, safer alternatives such as copper or PEX (cross-linked polyethylene). Verify that all work complies with contemporary plumbing codes and standards. You may need to collaborate with local building inspectors and obtain the necessary permits to confirm the project meets all legal requirements.
Plan for unexpected issues
When working on older homes, always plan for the unexpected. Hidden repairs and unforeseen issues are common, so it’s essential to build a contingency budget and timeline into the project plan. Communicate openly with homeowners about the potential for unexpected issues and the importance of addressing them to help protect the long-term functionality and safety of the plumbing system.
Use specialized techniques and tools
Utilize specialized techniques and tools designed for working with older plumbing systems. This includes using flexible materials such as PEX for easier installation in tight or awkward spaces and employing trenchless technology for sewer line repairs to minimize disruption to the property.
Engage experienced plumbing professionals
Working on older homes requires a high level of expertise and experience. Consider engaging a plumbing professional who has a proven track record of successfully handling the diverse difficulties associated with older plumbing systems. Experienced tradesmen will be able to provide valuable insights and recommend the best materials and techniques while making sure the project is completed efficiently and to the highest standards.
Old Pipes, New Tricks
Plumbing in older homes presents a unique set of challenges that require careful planning, specialized knowledge and a proactive approach. By utilizing the latest technology and proven best practices, however, professional tradesmen can navigate these challenges more proficiently than ever before.
Remember, successfully handling a plumbing repair or renovation project in an older home not only enhances the safety and comfort of its inhabitants, but also preserves the integrity and value of the property.
 Aaron’s Plumbing Inc., is a prominent company specializing in residential plumbing and heating. With more than 30 years of experience in the industry, Aaron’s focuses their expertise on providing the right solution in a timely manner.
By: Luis Arias, Inside Technical Sales, SFA Saniflo Submersible pumps have been game-changers for over a century, far outpacing old-school pumping methods and becoming essential tools across residential, commercial, and industrial applications. These workhorses, built to get dirty in the fluids they pump, broke through the constraints old tech couldn’t handle, providing contractors a way Read more
By: Luis Arias, Inside Technical Sales, SFA Saniflo
Submersible pumps have been game-changers for over a century, far outpacing old-school pumping methods and becoming essential tools across residential, commercial, and industrial applications. These workhorses, built to get dirty in the fluids they pump, broke through the constraints old tech couldn’t handle, providing contractors a way to install more efficient and dependable pumps.
Let’s focus on the compact units – the ‘sewage ejectors’ – that contractors throw in daily for home and light commercial jobs. Rolled out in the early 20th century, these nifty little pumps chucked the rulebook for gravity-based systems, offering a slick solution for moving sewage out of the deepest basements or flat yards where gravity checks out. When sewage ejectors hit the market, they didn’t just raise the bar; they threw it out and set a new standard in wastewater management, clearing the path for the updated tech used now.
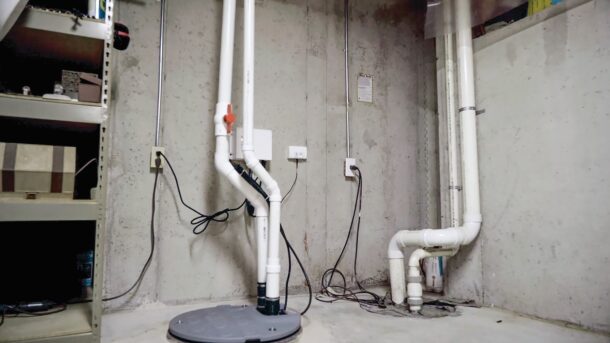
But let’s cut to the chase: sewage ejector tech hasn’t seen much action since it first appeared. As homes and systems age, installers are stuck with the same old tech, facing the same old headaches. The lack of new gear means they deal with the same float switch failures, blockages, and nasty repair jobs.
Consequently, advancements are urgently needed to tackle the everyday battles installers face with float switches, clogs, and the clean-up that comes after. It’s time for the next leap forward to make installation easier and keep businesses pumping.
Too Soon to Fail
The lifespan of sewage ejectors is a concern for many industry professionals. Generally, these devices have a lifespan of around 7 to 10 years. However, a common issue during this timeframe is the malfunctioning of the float switch component.
The float switch, responsible for controlling the pump’s activation and deactivation, often fails after two to five years of usage. This frequent occurrence has become a well-known challenge in the field, prompting installers to anticipate and prepare for the potential need for repair or replacement within a relatively short span. Addressing this issue is crucial to ensure the continued reliable operation of sewage ejectors and to minimize disruptions in wastewater management systems.
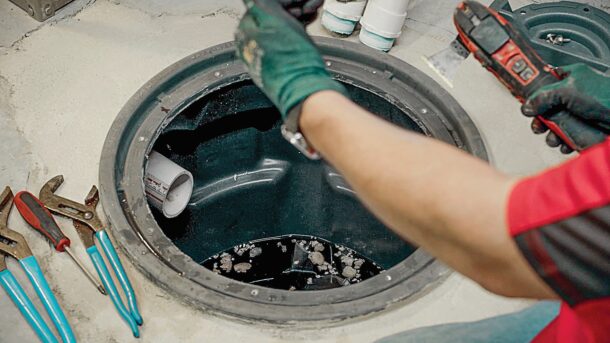
Here are other common challenges of existing sewage ejectors:
- Frequent clogging and jamming: Sewage ejector pumps move wastewater from lower to higher elevations. In the process, they can encounter solid waste and a potential excess of sanitary napkins or toilet paper, which can cause blockages. If the pump is not properly equipped or maintained, these blockages can disrupt the flow of wastewater and result in backups and overflows, causing potential health hazards and property damage.
- Frequent occurrence of system failures: Sewage ejector pumps can experience mechanical issues, such as motor or pump malfunctions, leading to pump failure and ineffective wastewater conveyance. Furthermore, improper installation or sizing of the pump can also contribute to system failures, as it may need more capacity to handle the volume and pressure requirements.
- Frequent repairs with high maintenance costs: Over time, these sewage ejector pumps can become prone to issues such as motor burnout, worn-out seals, or, as mentioned, malfunctioning float switches. These problems can result in pump failures, leading to sewage backups and potential health hazards. The costs of frequent repairs, including parts and labor, can quickly add up.
- Messy Repairs: Traditional sewage ejector pumps can be difficult, dirty, and time-consuming to repair and may require extensive professional assistance. Complex repairs may even involve digging up floors to access and replace the pump. Furthermore, the mess and odors associated with sewage pump repairs can be unpleasant and unhealthy.
Grinder Pump Technology: Alternative Solution
Dominick Rudd, a seasoned plumber at Bush Plumbing outside Indianapolis, has successfully implemented the SFA Saniflo Sanipit 24 GR retrofit pump kit as a reliable solution for replacing faulty sewage ejectors. This innovative product is compatible with existing 24-inch basins from major manufacturers like Liberty Pumps, Zoeller, and Myers, simplifying installation without extensive modifications.

Rudd praises the Sanipit for its easy installation, maintenance convenience, and dry-cavity design that separates the motor from sewage. The built-in, 1-horsepower grinder motor efficiently handles waste, improving performance and customer satisfaction. Rudd highlights the pump’s easy access for maintenance and its long lifespan, promising minimal upkeep and fewer replacements for homeowners.
Major Benefits for Contractors
By incorporating the Sanipit 24 GR retrofit pump kit into his projects, Rudd is poised to overcome the common challenges associated with sewage ejectors across North America.
Fellow contractors like Rudd benefit from simplified installations, reduced maintenance requirements, and the ability to offer cost-effective solutions to their clients.
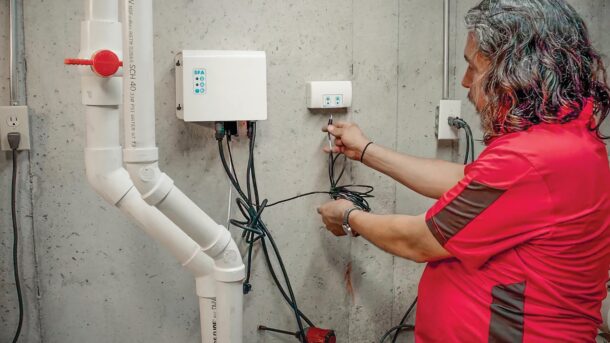
Notably, the Sanipit 24 GR retrofit pump kit aligns perfectly with Bush Plumbing’s commitment to providing its customers with top-notch service and innovative solutions. By leveraging the kit’s features and benefits, Rudd and the Bush team deliver value to their clients, enhancing their company’s reputation as trusted plumbing experts.
With a four-year warranty, contractors can now enjoy peace of mind for their clients, knowing they installed dependable and efficient waste management systems. At the same time, they have also found a cost-effective, reliable replacement solution that streamlines their work and enhances their professionalism.
About the author: Luis Arias has been working for SFA Saniflo for 15 years as Inside Technical Sales. His vast knowledge of pump systems and the plumbing trade has been used on many large-scale projects. Luis has contributed to the overall company success by working directly with architects, engineers, and trade professionals on engineering bids.
