Contractors out in the field are always looking for one tool that does it all. Our ClogChopper® is a great tool that can be connected to almost any drum, flexible shaft or sectional style machine, and cuts through obstructions in the pipe. Our ClogChopper has four features that make it the “all-star” attachment – it is Read more
Just the Tip
Contractors out in the field are always looking for one tool that does it all. Our ClogChopper® is a great tool that can be connected to almost any drum, flexible shaft or sectional style machine, and cuts through obstructions in the pipe.
Our ClogChopper has four features that make it the “all-star” attachment – it is maneuverable, efficient, versatile and economical. In this blog post, we talk more about these features and how they make the ClogChopper stand out.
Maneuverable
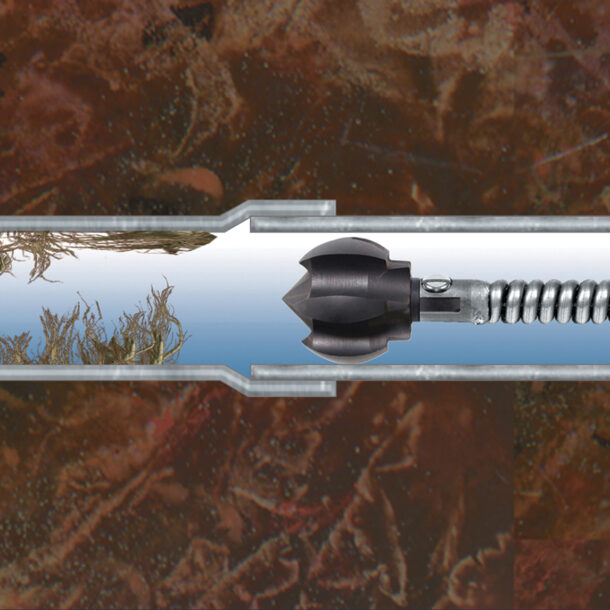
The perfectly balanced ClogChopper automatically negotiates multiple, tricky bends – maintaining a central line position and minimizing pipe wall, elbow, connection and joint damage. The ClogChopper essentially “bounces” around the pipe to get to where the user needs it to go.
Efficient
With “all surface” cutting edges, the ClogChopper clears clogs and scrapes encrusted debris from inner walls – all in one operation. The six inverted cutting edges run smoothly, without rattling or jumping. The spherical design helps to maneuver around tight bends and traps, thoroughly and safely cleaning metal, plastic and clay pipes to make it more efficient while going through the pipe.
Economical
The ClogChopper is durable enough to handle years of demanding use in residential and commercial applications, and self-sharpens while working, making it the perfect tool for handling multiple jobs and lasting a long time for the user.
Versatile
General offers ClogChopper connectors in a variety of sizes for several brands of drain cleaning machines.
The ClogChopper has six self-sharpening blades that dig into encrusted debris and root masses, easily grinding up stoppages, scale and crystallized urine without risking pipe damage. It works in both directions, in and out lines, all in one operation. As it spins, it also self-sharpens as it scrapes along the pipe walls.
It’s available in one-inch, one-and-a-half-inch, two-inch, two-and-a-half-inch, three-inch and four-inch sizes. This drain clearing tool is also excellent for clearing stacks, downspouts and mains, as well as for pipe lining jobs to reinstate the pipe.
For more information, call the Drain Brains at 800-245-6200, or visit www.drainbrain.com/clogchopper.
In a hydronic system, every installation is an opportunity to improve efficiency. The products you select for the job not only impact the installation of today but the performance of tomorrow. This is especially true when installing a boiler; the components you pair with the unit can mean the difference between a simple installation and Read more
In a hydronic system, every installation is an opportunity to improve efficiency. The products you select for the job not only impact the installation of today but the performance of tomorrow. This is especially true when installing a boiler; the components you pair with the unit can mean the difference between a simple installation and a smarter installation.
Auxiliary boiler accessories range in both form and function. The best products for the job should be designed to save time, space, and labor during installation. They should also provide controls to ease future maintenance and should protect the boiler and system components over time.
With these goals in mind, Webstone has developed the most complete selection of under boiler solutions available today. Its under boiler program is a single source for better installations, with products that also simplify and reduce the number of maintenance callbacks.
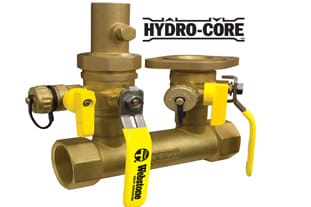 The Hydro-Core™ manifold simplifies the installation and service of the primary heating loop. This solution combines closely-spaced tees with isolation valves to achieve hydraulic separation for the heating loops, isolates the components within the loop, and purges the system. A T-Flow ball directs the flow into either the boiler or the drain, which can be configured in a number of ways to assist with purging, filling, and descaling/cleaning. Its compact, forged-brass body replaces up to 17 individual components, eliminates 16 leak paths, and saves over two hours of labor.
To improve overall system performance, the Air Separator uses a unique stainless-steel coalescing medium that captures both microbubbles and static air. The separated air collects in the top of the unit, where it forces a pin-guided float to drop down and open a vent. Once the air is released, the float rises once again and closes the vent. This reduces noise as well as wear on system components caused by trapped air in the pipes. The vertically mounted model is ideal for installing on the boiler outlet, where the air can be separated and vented before it reaches the rest of the system.
To protect the boiler from iron sludge that can accumulate in a hydronic system, consider the Magnetic Boiler Filter. Installed on the system return line, it captures ferrous and non-ferrous debris before it can reach the boiler using a high-powered 12,000 Gauss magnet and plastic filter. The drain makes it simple to remove accumulation, with a strapped cap that can be used to actuate the drain valve. A universal diverter allows the Magnetic Boiler Filter to be used in both horizontal and vertical piping orientations. The service tool is also included to help install and maintain the filter with ease.
Both the vertical mount Air Separator and Magnetic Boiler Filter are outfitted with removable G1 threaded end connections (available in sizes ¾” and 1”, with MIP, FIP, SWT, or Press ends), offering added versatility to any installation. These threads allow the installer to easily add isolation valves for future service, or a temperature gauge to verify boiler output right at the source.
A full-featured under the boiler installation from Webstone requires no more than 22” of space and delivers cleaner, more professional-looking results. Solutions are also available for boilers with external pumps and combi domestic hot water connections from the E-X-P™ Series of Tankless Water Heater Service Valves. To find all of these products and more, visit www.webstonevalves.com.
Founded in 1954, Webstone now operates as a brand of NIBCO INC. and is recognized as an industry leader for innovative design of residential and commercial valves used in plumbing, hydronic, radiant, solar and geothermal applications. These designs focus on time and space-saving concepts that simplify future maintenance and upkeep of all piping systems. Some of the Webstone trademarked and patented items include Hydro-Core™, The Isolator®, E-X-P™, Pro-Connect™, and Pro-Pal® step-saving valves.

Is your HVAC company still trying to service clients without sewer line video equipment? A sewer line camera is an invaluable diagnostic tool that allows HVAC professionals to see inside plumbing systems beyond what can be observed with the naked eye. As you know, a home’s plumbing system is actually an integral part of its Read more
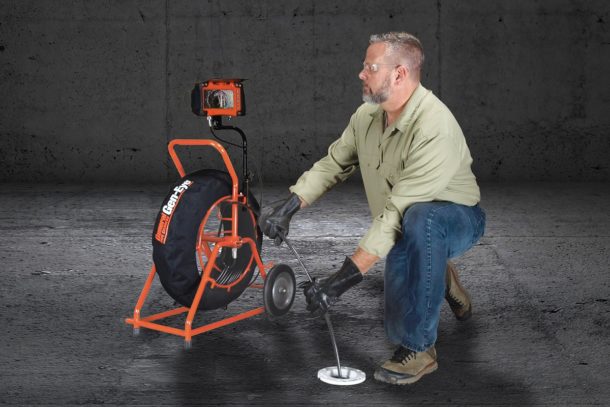
Is your HVAC company still trying to service clients without sewer line video equipment? A sewer line camera is an invaluable diagnostic tool that allows HVAC professionals to see inside plumbing systems beyond what can be observed with the naked eye. As you know, a home’s plumbing system is actually an integral part of its HVAC system because it’s common for HVAC systems to connect to main sewer lines via drainage lines. This setup makes it possible for collected water to drain out of the home via larger pipes. However, the sewer line remains a mystery for most HVAC pros. Don’t let your inability to get a clear view lead to a frustrating misdiagnosis. Sewer line cameras make is easy to accurately and clearly diagnose the following issues in minutes:
- Odors.
- Blockages and clogs
- Broken or cracked parts
For clients, getting an accurate and fast diagnosis is valuable because it saves both time and money. It also safeguards them from spending money on the wrong solution. Sewer line cameras erase the need for hunches and best guesses. That’s precisely why so many clients now expect a camera-based inspection when they call an HVAC pro to help with a mysterious problem. Here’s a look at the two core reasons why your HVAC company needs sewer line video equipment.
Sewer Line Cameras Save Money
Why spend countless hours making a single diagnosis when you can get a crystal-clear picture of the problem in minutes? Snaking cameras allow HVAC pros to diagnose an issue in the fraction of the time it once took to troubleshoot plumbing-adjacent problems. The high level of accuracy created by a visually based diagnosis also saves money by reducing the risk that you’ll get a call back from the customer hours or days later letting you know that you didn’t provide the right fix. The savings offered by a sewer line camera are compounded if your company offers fixed-rate pricing or free services through service plans.
Sewer Line Cameras Can Lead to More Satisfied Customers
Customers love the transparency and accuracy that come from plumbing cameras. First, customers feel confident when working with companies that embrace the latest technology to innovate their services instead of relying on outdated techniques. Next, customers also appreciate the ability to see the finished results in real time. Generally, HVAC work involving sewer lines or drain lines is “hidden” because it can’t be observed from the surface. However, sewer line cameras give your clients the ability to see that a clog, crack, or other issue has been detected with real-time visual proof.
How to Choose the Best Sewer Camera for Your HVAC Business
When selecting a high-quality sewer line camera for your HVAC business, it’s important to prioritize models that offer high-quality video recording, high-quality audio performance, LED lighting, wide-screen viewing, a typewriter feature for notes, and capabilities for data sharing and storage. That last feature on the list is important because clients will generally request to see your footage. In addition, it’s important to select a camera with adequate recording time to ensure that footage doesn’t stop during a critical recording moment. It goes without saying that any camera you select should also be 100% waterproof.
Of course, it’s also important to select a sewer camera that’s in your purchasing budget. If you’d like to save money because your HVAC company only requires camera footage of plumbing lines occasionally, hiring a local plumbing company offering sewer line video inspection services may be the more economical choice because you won’t need to purchase and maintain your own pricey camera equipment. The other benefit of hiring pros for the job is that sewer line cameras should only be operated by experienced professionals in the first place.
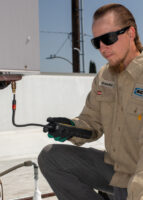
Okay, we know soap bubbles are the traditional method for refrigerant leak detection on HVACR systems and they can be a very tried and true indicator. But when you need to pinpoint micro-leaks fast, an electronic detector with a higher sensitivity than bubbles can be the ticket. The four main types of electronic leak detectors Read more
Okay, we know soap bubbles are the traditional method for refrigerant leak detection on HVACR systems and they can be a very tried and true indicator. But when you need to pinpoint micro-leaks fast, an electronic detector with a higher sensitivity than bubbles can be the ticket.
The four main types of electronic leak detectors available to HVACR techs include: heated diode, corona discharge, infrared and ultrasonic. The following is a snapshot of how the different technologies work and the ins and outs of each to help you determine which is the best fit for your toolkit.
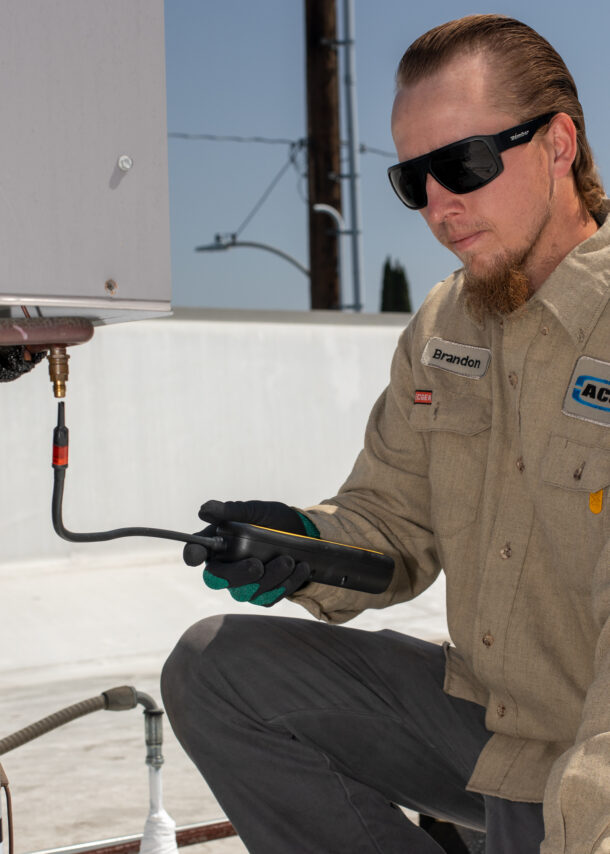
Heated Diode Detectors
With a heated diode detector, sampled air is heated to a high temperature, ionizing halogenated refrigerant gases. The resulting charged chlorine and fluorine ions, even in trace amounts, generate current through the diode which then triggers an alarm. Heated diodes detect leaks of HFC, CFC, HCFC, HFO, H2N2 (Tracer Gas) and other refrigerant blends. The Fieldpiece DR58 Heated Diode Leak Detector performs particularly well with R410A and sniffs refrigerant leaks as small as 0.03 oz/yr – that’s 20 times more sensitive than soap bubbles.
Heated diode detectors are not prone to false alarms, but their sensor life may be affected by excessive refrigerant exposure and contaminants like oil. The sensor should be checked regularly with a calibrated reference leak. It is recommended to replace to the Fieldpiece DR58 sensor after approximately 300 hours of use.
Corona Discharge Detectors
In a process similar to heated diode detectors, corona discharge detectors also react to a change in current flow from ionized gases. However, they pull sample air through an electrical field around an electrode. Gases are broken down by the electric arc (corona discharge), causing a change in electrode current which then signals a leak.
False alarms can occur with corona discharge detectors because they do not trigger on specific refrigerant compounds. Response times are slightly slower than heated diodes and corona sensor life can be as short as 24 hours of use.
Infrared Leak Detectors
Infrared detectors shine a beam of infrared (IR) waves through potentially contaminated air to detect and analyze trace amounts of refrigerant and signal a leak. Because light absorption in the IR spectrum is gas-specific, they are the least susceptible to false-positive alarms and considered highly accurate across all refrigerant types. Infrared detectors also have the edge with newer refrigerants that contain less chlorine and fluorine, the trigger for heated-diode sensors.
When considering the cost of ownership of a leak detector, the long life of the infrared sensor will factor in the equation. For example, the sensor life is approximately 10 years for the Fieldpiece DR82 Infrared Leak Detector.
Ultrasonic Leak Detectors
An ultrasonic leak detector is also known as a “listening detector.” When refrigerant escapes from a pressurized system, it creates tiny sound fluctuations in the form of high-frequency sound waves that the sensor picks up.
These detectors can hear very small leaks on high-pressure systems and their sensors last for a long time. However, when a system has low pressure, these detectors are not as accurate or effective. Ultrasonic leak detectors can also be affected by jobsite noise.
Techs have multiple options when looking for electronic leak detection tools, including heated diode, corona discharge, infrared, and ultrasonic. While each has its merits, the tool that’s right for you will depend on the refrigerants you work with now and expect to work with in the future, the accuracy desired, and your sensitivity to overall cost of ownership. An electronic leak detector is an investment that makes your job easier, so it’s worth the homework to figure out which one needs a spot in your tool bag!
Courtesy of Fieldpiece Instruments
Being informed on the safety of drain cleaning and the dangers of it is very important when out in the field. Whether it be knowing what drain cleaning tools should be used for the job, what safety gear to wear and proper care for your equipment. In this blog post, we will discuss the dangers Read more
Being informed on the safety of drain cleaning and the dangers of it is very important when out in the field. Whether it be knowing what drain cleaning tools should be used for the job, what safety gear to wear and proper care for your equipment. In this blog post, we will discuss the dangers and safety measures that plumbers should be aware of.
 Dangers in drain cleaning
Dangers can be incurred if you use the wrong tool for the job. For example, if you have too small of a cable in too large of a drain or too large of a cable in too small of a drain, you can get the cable caught and you can cause damage to the equipment.
Also, if this should happen and you aren’t using a power feed with a guide tube on it to separate the user from the cable, there is the possibility that you can get a kink in the cable and it can grab the user by the hand or the arm—which can hurt!
Operating drain cleaning equipment should be more like using a drill than a hammer. The user should leverage the rotation of the cable and the cutter to eat its way through the obstruction, applying gentle, forward pressure. Using the right drain cleaning machine can significantly reduce the risks associated with drain cleaning.
Finally, because you are using electricity in the vicinity of water flow, make sure your electrical source is grounded with a properly functioning GFCI to protect from the possibility of an electrical shock.
PPE
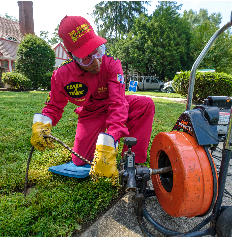
Two-ply, leather gloves are highly recommended when using hand tools or drain cleaning equipment, but any kind of gloves that are specifically made for drain cleaning will work. Do not use rubber or cloth gloves, as you run the risk of getting them caught in the coils of the cable. If you must wear rubber gloves, wear them underneath the recommended leather gloves. Protective eyewear is also recommended for obvious reasons. You really don’t need anything else; it’s not necessary to garb up in a hazmat suit for drain cleaning.
Emergency response plan
We like to preach that preventative maintenance is always better than an emergency response plan.
Preventative maintenance would be a plan to regularly snake out drains because you know that if you don’t, they will have the propensity to back up.
The buildup of grease is particularly a problem in multifamily units and food service facilities, which causes emergency situations. For drains that are commonly affected by grease, we strongly recommend that companies invest in small, high-pressure water jetters, which are the right tools for the job.
Grease is not a job for a drum-style cable machine—it will poke a hole in the grease, but it will not remove the grease clog. We recommend preventative maintenance, using a high-pressure water jetter in at-risk pipes on a regular basis as opposed to waiting for them to overflow and creating an emergency. Handling clogged drains, especially when dealing with tough clogs like grease and sludge, requires the right equipment. Preventative maintenance is always easier, cheaper and more time efficient than emergency management.
When investing in basic drain cleaning equipment, companies don’t have to wait for a drain cleaning contractor to come out and do the job. Facility managers can include drain cleaning equipment into their long-term preventative maintenance programs. They will often find additional ways to put the equipment to use that they hadn’t thought of before.
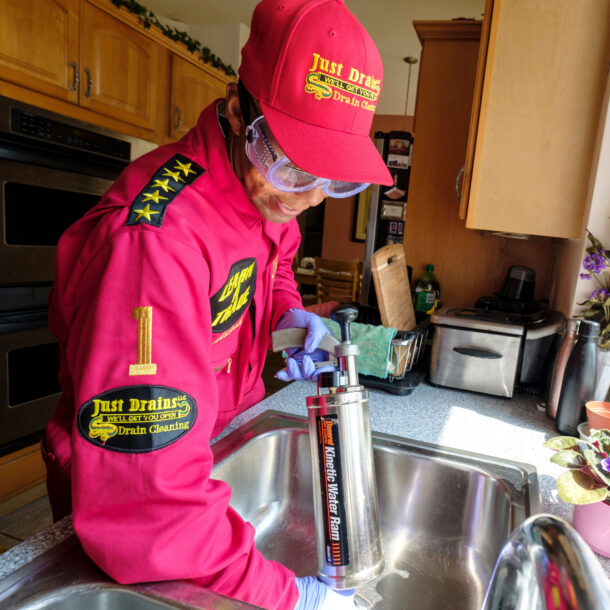
Safely and correctly operating and cleaning equipment and drains
The actual care and preventative maintenance of the drain cleaning equipment should not be overlooked. Every time the machine is used, we recommend that you clean it off and let the water drain out of it. Once the water has been completely drained, we recommend applying snake oil or lubrication to the cables. If you’re using a jetter, you should also clean out the hose and take proper care of the pumps.
Every 200 hours, perform routine maintenance on your equipment—check oil levels, seals, cables and drums. Five minutes of post-job maintenance on equipment will go a long way to preserving your equipment, sometimes for 10 years or more. Maintaining drain cleaning cables and tools is crucial for the longevity of your drain cleaning equipment.
Regular maintenance of your cleaning tools, from a simple sink cleaning hand tool to complex sewer cleaning equipment, ensures longevity and peak performance. Always check for debris that might have been left behind, clean out the drum, and ensure that water is properly drained after each use. Regular upkeep reduces the chances of blockages in your cleaning machine and guarantees that you’re always ready to handle even the toughest clogs.
Here at General Pipe Cleaners, safety is a top priority, which is why it’s important to understand the dangers of drain cleaning and how to perform the job safely.
Questions? Call the Drain Brains at 800-245-6200
 Dangers in drain cleaning